If you are looking to learn how to tattoo straight lines with ease, then this step-by-step guide is just what you need. Here, you will find a comprehensive overview on how to tattoo straight lines to ensure you create perfect lines every time. Whether you are a beginner or a seasoned tattoo artist, this guide will provide you with the tips and techniques necessary to ensure your lines are crisp and accurate. So, let’s get started on learning how to tattoo straight lines.
Contents
Benefits of Straight Lines
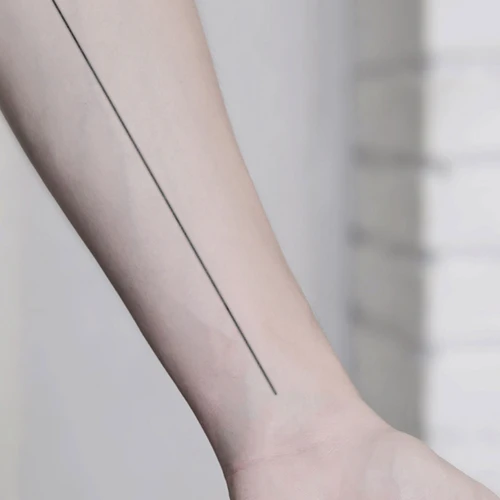
Straight lines are one of the essential elements of any tattoo, and mastering the basic technique of how to tattoo a straight line is an essential skill for any tattoo artist. Straight lines are the backbone of any good tattoo, they create structure and balance, and they can be used to define the shape and size of the tattoo. Straight lines also help to create a sense of depth, they can be used to add an element of movement, or to create a border around the tattoo. Straight lines are versatile, and they can be used to create a variety of different designs.
Straight lines also have a number of technical benefits. They are easier to create than curved lines, since the needle does not need to be moved as much. This makes it easier to control the placement of the line, and to ensure that it is even and consistent. Straight lines also help to reduce the amount of time it takes to complete a tattoo, since there is less movement of the needle. This helps to make the process more efficient, and to ensure that the tattoo is of the highest quality.
Preparation and Supplies Needed
- Tattoo Machine: Choose a good quality tattoo machine that’s comfortable to use and has adjustable speed and depth settings.
- Tattoo Needles: Use the right type of needles for the job. For straight lines, you’ll need a round shader or round liner needle.
- Inks and Colors: Choose inks and colors that suit your design and will last a long time.
- Transfer Paper: Use transfer paper to draw a detailed outline of your design onto the skin.
- Razor Blades: Keep some razor blades on hand to clean up any mistakes or smudges.
- Tattoo Stencil: You can use a tattoo stencil to get a precise outline of your design.
- Gloves, Masks, and Protective Gear: Wear gloves, masks, and other protective gear to prevent the spread of infection and other risks.
- Cleaning Supplies: Have a cleaning solution and other supplies on hand to clean and sterilize the area before and after the tattooing.
Step-by-Step Guide
- Set Up Your Workstation: Gather all the necessary supplies and set up your workstation. Make sure you have your tattoo machine, ink, needles, clips, gloves, and other items you may need.
- Prepare the Skin: Make sure to disinfect the area you are working on. Shave the area and apply a thin layer of vaseline or other lubricant to reduce friction.
- Draw the Line: Carefully draw the line onto the skin with a tattoo pen or marker. Make sure the line is thick enough to be visible while you are tattooing.
- Set Up the Machine: Put the needles into the machine and make sure the needle depth is set to the right level. Adjust the power and speed of the machine according to the size of the line.
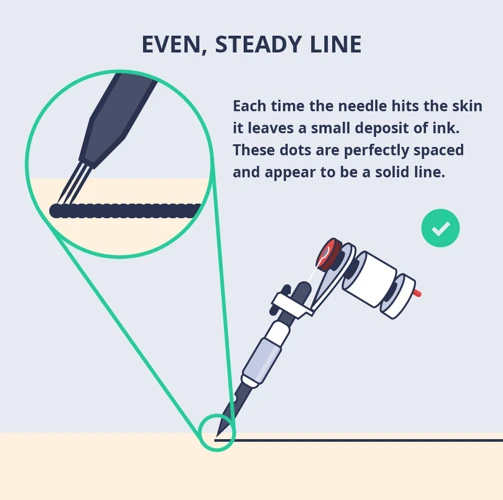
- Tattoo the Line: Slowly and steadily follow the line you have drawn using the machine. Make sure to keep the machine moving at an even speed, and to keep the needle at an even depth.
- Clean Up: When you have finished tattooing the line, carefully clean up the area with a damp cloth. Apply a thin layer of petroleum jelly or other healing agent to the area to promote healing.
Step 1: Skin Prep

- Skin prep is the most important step in the tattoo process. It is crucial to ensure the skin is clean and free from dirt and oils to give the best results and help the lines stay straight.
- The skin must be shaved as close to the tattoo as possible, but be careful not to cut the skin.
- A sterile alcohol pad should be used to cleanse the skin.
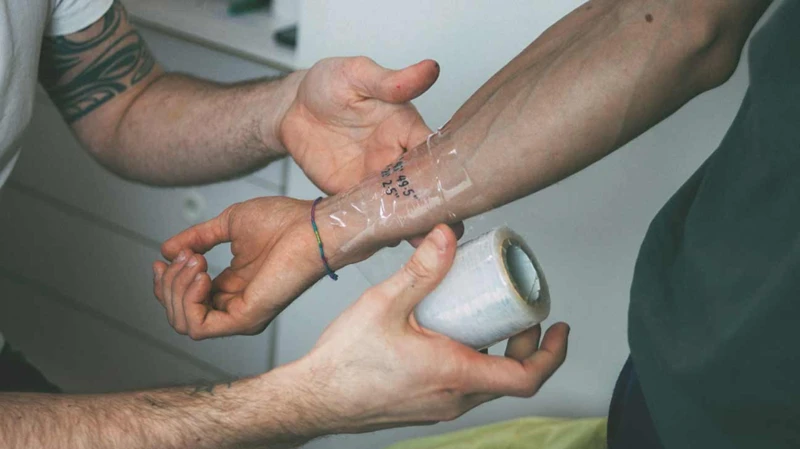
- A barrier cream should be applied to the skin prior to tattooing to provide a protective layer.
- Finally, a stencil should be applied to the skin to ensure the design is in the right place and the lines are straight.
Step 2: Outline
To get the perfect line, you need to have an outline of the desired area you want to tattoo. Make sure to draw the outline as precisely as possible and use a ruler or straight edge to make sure the lines are straight. To draw the outline, use a marker or a pencil, then use a razor blade or a sharp knife to cut through the outline. This will ensure that the line is accurate and that the design will be even and uniform.
Step 3: Fill In the Line
- Using a Shading Needle – A shading needle is a slightly thicker needle than the outlining needle and is used to fill in the outline with ink. The shading needle consists of multiple needles that come together to form a single needle. It is used for shading in the tattoo and to fill-in the outline.
- Varying the Pressure – When shading with a needle, it is important to vary the pressure that you are using. This will give you a more natural-looking effect and will also help to prevent any areas from becoming over-filled with ink. To do this, start with a light pressure and then gradually increase pressure as needed.
- Creating Different Shades – To create different shades when filling in the outline, you can use different types of needles and different amounts of ink. By using more ink, you can create a darker shade, and by using less ink, you can create a lighter shade. Additionally, you can use different types of needles to create different effects.
- Finishing the Line – Once you have filled in the outline, you should go back and finish the line. To do this, you should use the outlining needle that you used to create the outline. This will ensure that the line is clean and crisp and will help to give your tattoo a professional look.
Step 4: Aftercare

- Keep it Clean: Immediately after tattooing, the area should be gently washed with mild soap and warm water and patted dry. For the next two weeks, the area should be cleaned twice a day to prevent infection and the formation of scabs.
- Apply Ointment: After washing and drying the area, a thin layer of ointment should be applied. This will help to protect the area and keep it hydrated.
- Avoid Sun Exposure: The area should be kept out of direct sunlight and away from tanning beds during the healing process to prevent discoloration.
- Be Careful: Avoid picking or scratching the area as this can cause scarring and lead to infection.
- See a Professional: If there are any signs of infection, such as redness, swelling, or discharge, consult a medical professional immediately.
Troubleshooting Tips
- Check your needle – The needle should be sharp and evenly spaced. If it’s bent or dull, replace it.
- Hold the needle at the right angle – Don’t hold the needle at a 45-degree angle. Instead, keep it perpendicular to the skin so that the ink stays on the surface.
- Use the right ink – Use a professional-grade tattoo ink that is specifically formulated for tattoos. Avoid using substandard inks.
- Keep the area clean – Make sure the area you are working on is clean and free of any dirt or oil. Any foreign particles can interfere with the ink.
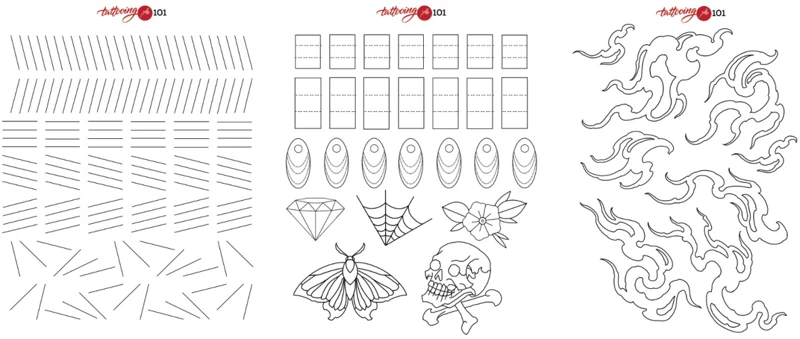
- Take your time – Don’t rush the process. Take your time to make sure the lines are straight and even.
- Practice, practice, practice – The more you practice, the better you get. Draw out the lines on paper and practice with a fake skin to perfect your technique.
Tools To Avoid
- Rulers: Rulers are not recommended for drawing straight lines as the metal edge may cause your skin to tear.
- Pencils: Pencils are not suitable for creating straight lines as they are too light and may smudge.
- Sharpies: Sharpies are not recommended as they can cause the ink to smudge and bleed.
- Alcohol: Alcohol should not be used to draw a straight line as it can dry out the skin and cause scarring.
It is important to use the right tools when learning how to tattoo a straight line. The wrong tools can cause the ink to smudge and bleed, or cause your skin to tear. Tools such as rulers, pencils, Sharpies, and alcohol should be avoided as they are not suitable for creating a straight line.
Frequently Asked Questions
What Tools are Needed to Tattoo Straight Lines?
To ensure steady, straight lines while tattooing, it’s important to use the right tools. This includes an electric tattoo machine, a power supply, a footswitch, and disposable needles and ink caps. For the best results, it’s important to use a professional-grade tattoo machine with adjustable speed and power. Additionally, use a disposable needle to ensure a clean, precise line, and a steady hand. Finally, practice on practice skin before attempting a real tattoo.
What Type of Needle Should be Used?
For clean, straight lines, it is important to use a needle that is specifically designed for tattooing. A standard round needle is the most common type used for filling in areas, creating thicker lines and shading. For creating precise straight lines, a liner needle should be used. Liner needles have a smaller diameter and are ideal for outlining and creating thin, crisp lines.
How can I ensure I get a good line when tattooing?
- Set the machine at the correct speed: The correct speed for the tattoo machine should be set before starting the line. Too slow and the line will be too thick and won’t be straight. Too fast and the line will be too thin and will be wobbly.
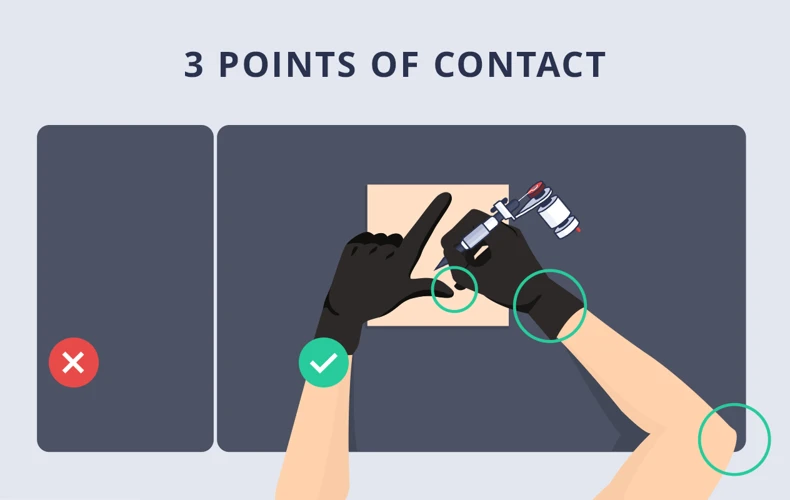
- Pull the skin tight: Making sure the skin is tight will help keep the line straight. Use your free hand to pull the skin in the direction of the line you are drawing.
- Use a ruler or stencil: Using a ruler or stencil can help you keep the line straight. Make sure to keep the stencil or ruler in place while tattooing.
- Take your time: If you rush the tattoo, the line will be wobbly and won’t be straight. Take your time and be patient while tattooing.
- Check your work: It is important to check your work before moving on to the next line. If the line is not straight, go back and adjust it before moving on.
Are there any tips for avoiding mistakes when tattooing straight lines?
- Use a Ruler: Whenever possible, use a ruler or straight edge to ensure that lines are straight and even.
- Focus on the Final Result: Focus on the final outcome rather than each step. This will help you to stay focused and less likely to make mistakes.
- Practice: Make sure to practice drawing straight lines on paper before tattooing them on skin. This will help you to build up the necessary skills and muscle memory to ensure the best results.
- Take Breaks: Take regular breaks when tattooing straight lines to ensure that your hand is steady and your focus is maintained.
- Check Your Work: Always check your work after you have finished to make sure that all lines are straight and even.
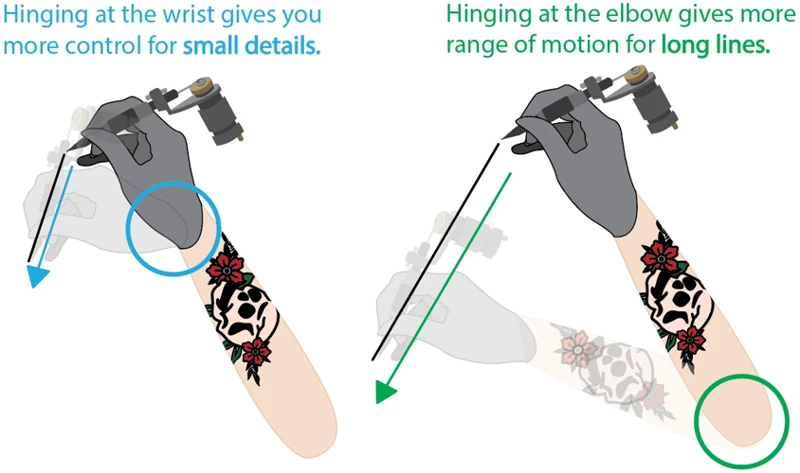
What Techniques Should Be Used to Ensure a Steady Line When Tattooing?
To ensure a steady line when tattooing, it is important to use slow, consistent strokes with the tattoo machine, maintain the same angle between the skin and the machine, and use a guide line to ensure the line is straight. Additionally, keeping the machine at a constant speed, using a steady pressure, and keeping the needle bar parallel to the skin will help create a straight line. Finally, it is important to pay attention to the ink flow and the amount of ink being used to prevent blurring.
Conclusion
By following the steps outlined in this guide, you can learn to tattoo straight lines with a high degree of accuracy. With practice, you’ll soon be able to create perfectly straight lines every time.