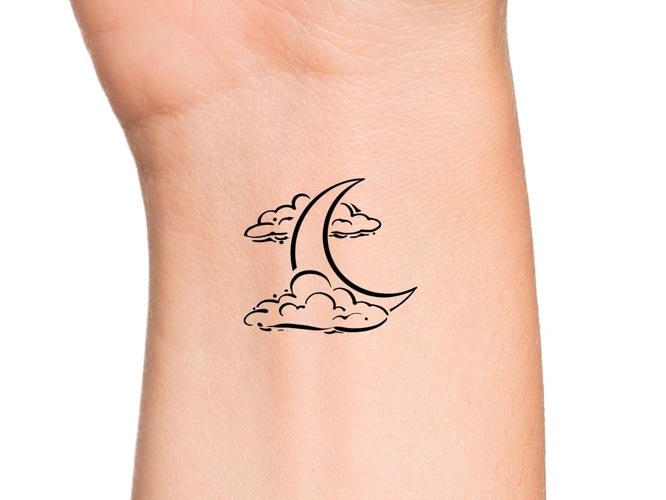
Are you looking to create a unique and breathtaking tattoo design? Then look no further than the sky – clouds have long been a popular choice for tattoos due to their beauty and symbolism. In this article, we’ll provide a step-by-step guide on how to tattoo clouds, so you can create a stunning work of art on your own skin.
Contents
Materials Needed
- Pencils to sketch the tattoo design and to create smooth lines.
- Colored Pencils for outlining and adding detail.
- Tattoo Ink for outlining and shading.
- Tattoo Pen for delicate work.
- Tattoo Needles in different sizes to create different line widths.
To create a realistic looking tattoo of clouds, these materials will be necessary for the job.
Step 1: Preparing the Surface and Design

- Clean the Skin: Before starting, make sure your skin is free of any dirt, lotion, or oils. Use a gentle cleanser and warm water to ensure the surface is clean.
- Transfer the Design: Trace the design onto the skin with a pencil or transfer paper. Use a light hand to ensure that the lines are not too deep or thick.
- Outline the Design: Once the design is transferred, use a needle to outline the design. This will ensure that the design is visible and will make it easier to add the shading and color.
- Shave the Skin: Using a razor or electric shaver, remove any hair in the area where the tattoo will be placed. This will help the ink to adhere better to the skin and prevent any irritation.
- Apply a Lubricant: Once the area is shaved, apply a thin layer of vaseline or petroleum jelly to the skin. This will help the needle to glide more smoothly and will reduce any discomfort.
Step 2: Outlining the Clouds
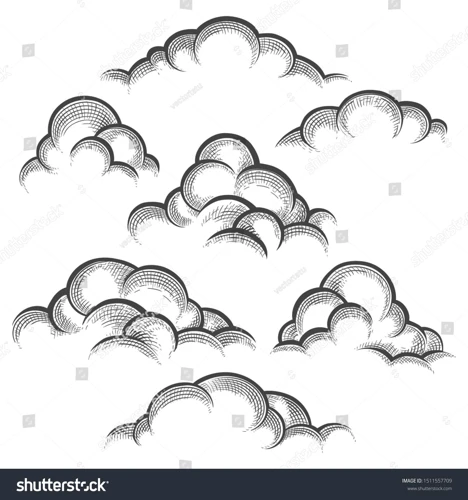
Begin by drawing a few basic shapes that will become the outlines of the clouds. Start with a few basic ovals, circles and curved lines. As you go along, feel free to adjust the shapes as needed to make them look more realistic. Use a pencil to sketch out the outlines. Once you are happy with the rough outline, use a tattoo machine to carefully outline the clouds in black ink. Make sure to take your time and go slowly. You should be able to make the outlines of the clouds in one or two passes.
Once you have finished outlining the clouds, go over the outlines again with a thicker line to give them more definition and depth. You can also use different shades of gray ink to add more definition and texture to the clouds. Feel free to experiment with different techniques to create the look you desire.
Step 3: Shading the Clouds

- Blending: When shading the clouds, it is important to blend the colors together to create a realistic effect. This can be done using a sponge, rag, or even a paintbrush.
- Darkening: To create a more dramatic effect, you can darken the clouds by adding layers of darker colors. This will help to make the clouds stand out more.
- Highlighting: To make the clouds look realistic, it is important to add highlights to the clouds. This can be done by adding lighter colors to the edges of the clouds.
- Adding Texture: To add texture to the clouds, you can use a sponge or rag to create a stippled or textured effect. This will help to make the clouds look more realistic.
Step 4: Adding Color

- Determine the Color Scheme: Choose the colors you want to use to make your clouds look realistic. Popular color schemes include shades of blue, violet, and gray.
- Fill in the Clouds: Starting with the lighter shades, fill in the clouds with your chosen colors. Make sure to leave some lighter areas to give your clouds a more natural look.
- Blend the Colors: Use a shading tool to blend the colors together. This will create a more realistic look and make your clouds look like they are floating in the sky.
- Add Highlights: Use a white or light gray ink to add highlights to your clouds. This will give your clouds a realistic, 3D effect and make them look like they are really in the sky.
Step 5: Finishing Touches
To finish the tattoo, use a thin needle to lightly fill in any areas that may have been missed. Use the same shading technique as before to make sure the entire tattoo is blended together nicely. Lastly, add a few white highlights to give the tattoo a more realistic look. If desired, you can also use a black liner to outline the cloud shapes and add a bit of depth to the design. Finally, apply a generous amount of healing ointment to the area and cover with a bandage.
Once the tattoo is done, it is important to take proper care of it. Make sure to keep the area clean and moisturized to ensure proper healing. Avoid exposing the tattoo to direct sunlight and swimming for at least two weeks. If you follow these instructions, you should have a beautiful cloud tattoo that will last for many years.
Aftercare
- Keep the tattoo clean: Wash the area with mild soap and water twice a day, and pat dry with a clean towel.
- Keep the tattoo moisturized: Apply a thin layer of fragrance-free lotion or ointment 3 to 4 times a day to keep the skin hydrated and healthy.
- Avoid direct sunlight: Sun exposure can cause your tattoo to fade, so you should wear SPF 30+ sunscreen, even on cloudy days.
- Avoid picking or scratching: Picking and scratching can cause your tattoo to heal improperly, so it is important to keep your hands away from the area.
- Avoid swimming: Chlorinated water can irritate the area, so it is best to avoid swimming for the first few weeks after your tattoo.
Frequently Asked Questions
What Tools Do I Need to Tattoo Clouds?
To tattoo clouds, you will need a few essential tools: a tattoo machine, a power supply, sterilized needles, ink, and a stencil. It is also important to make sure you have all the necessary safety gear, such as gloves and a face mask. Make sure to gather all these supplies before starting the tattooing process.
How do I achieve a realistic cloud effect?
Start by sketching the clouds in pencil. Using a light pencil, draw the basic shape of the clouds and the areas of light and shadow. Take your time to get the shape right and make sure to add subtle variations in the shading.
Fill in the shading with a grey or white tattoo ink. Depending on the desired effect, use either grey or white ink to fill in the shading and bring the clouds to life. Use a shading technique to create the illusion of shadows and highlights.
Add highlights with a white or light grey ink. For a realistic effect, lightly apply white or light grey ink to the topmost parts of the clouds to create the illusion of light reflecting off them.
Create a sense of depth with different tones of grey. By varying the tones of grey and adding darker shades in the background, you can create a sense of depth and give the clouds a realistic, three-dimensional look.
What techniques are most effective for blending and shading?
- Stippling: This is a technique that involves applying small dots to create a soft, patterned look. It is an effective way to blend and shade, as it can be used to create gradations of colour.
- Lines: Lines can be used to create a range of effects, depending on the thickness and direction of the strokes. This technique is often used to create shading and depth.
- Shading: Shading involves using a range of colours to create a gradual transition from light to dark. This can be used to create the illusion of depth and texture.
- Cross-hatching: This is a technique that involves using overlapping lines to create a shaded effect. It is a great way to create texture and depth.
- Smudging: Smudging involves gently blending the edges of the tattoo with a soft brush or cloth. This technique is great for creating a softer look and can be used to blend and shade.
What Types of Clouds Can I Tattoo?
Tattooing clouds has become increasingly popular. There are several types of clouds you can choose from, including cumulus, cirrus, stratus, and lenticular. Depending on your design, you may choose to combine different types of clouds to create a unique and intricate design. It is important to remember to use light and dark shades of gray to create the illusion of depth and movement.
Is it Possible to Tattoo Clouds on Any Skin Type?
Yes, it is possible to tattoo clouds on any skin type. However, the results will vary depending on the thickness, texture and complexion of the skin. If the skin is too thin, the lines may not be as crisp and can easily blur. If the skin is too thick, the lines may not be as visible and may not last as long. A skilled artist is able to adjust the technique to achieve the desired result.
Conclusion
Tattooing clouds requires a steady hand and a lot of patience, but it can be done. With the right materials, techniques, and practice, you too can create beautiful cloud tattoos. Just remember to take your time, and don’t be afraid to experiment with different shading and colors. With a little practice, you can create unique and beautiful cloud tattoos.