Are you looking to learn how to print perfect tattoo stencils with ease? With the right tools and techniques, you can create stunning tattoo stencils that are sure to wow your clients. This article will provide you with an overview of the basics of how to print tattoo stencils, as well as tips and tricks for achieving the best results. Read on to learn more about this exciting craft and how to create professional-looking tattoo stencils in no time.
Contents
Preparing for Printing
Gather Supplies
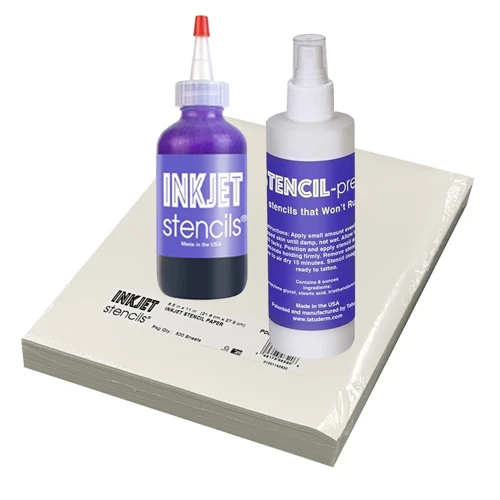
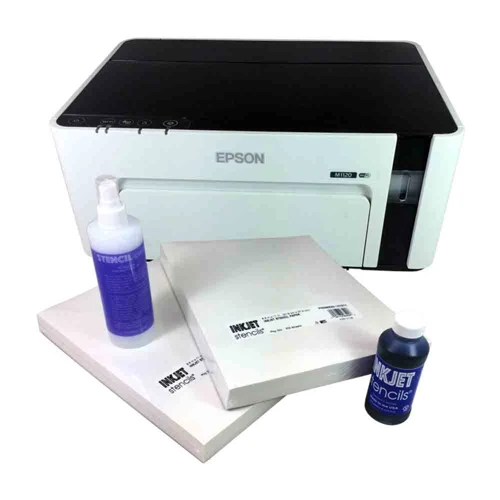
To create a perfect tattoo stencil with a printer, you will need a few important supplies. First, you will need a computer with a printer. Second, you will need tattoo stencil paper, which is specifically designed to print stencils. Third, you will need a tattoo transfer cream, and lastly you will need a stencil printer to transfer the tattoo onto the skin.
Design Your Stencil
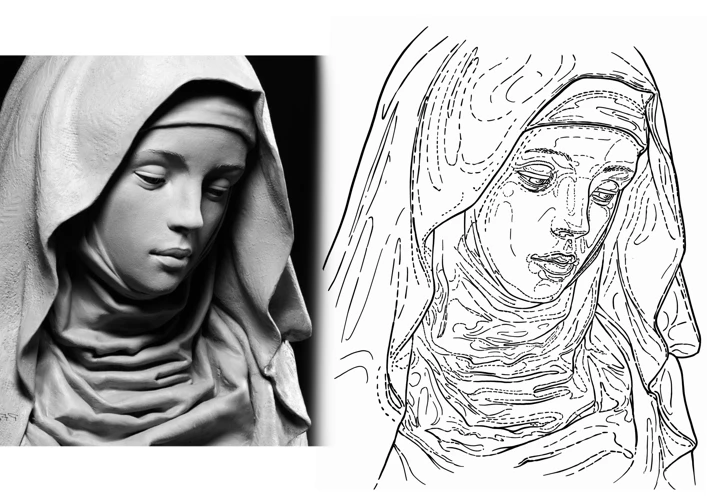
Designing a stencil is the most important step when it comes to creating a perfect tattoo stencil. You will want to make sure that your stencil is simple and easy to read, while also being accurate and detailed. To design a tattoo stencil, you will need to use a vector art program such as Adobe Illustrator or Corel Draw. Once you have designed your stencil, you will need to save it as a PDF or JPG file. Once you have saved the file, you can then print it out on the stencil paper using your printer.
Using a stencil printer is the last step in creating a perfect tattoo stencil. A stencil printer is a device that is specifically designed to transfer the stencil onto the skin. To use a stencil printer, you will need to place the stencil paper on the device and then apply the tattoo transfer cream onto the paper. Once the cream has had a chance to set, you can then apply the stencil to the skin and the tattoo stencil will be complete.
With these simple steps, you can easily learn how to make tattoo stencils with a printer. You will be able to create a perfect tattoo stencil with ease and confidence.
How to Print Tattoo Stencils at Home
Inkjet Printer Method
To print out a tattoo stencil with an inkjet printer, you’ll need a special type of paper that’s specifically designed for this purpose. Start by printing your design onto the paper and then cut out the stencil. Once the stencil is cut out, you can use a special transfer gel to transfer the design onto the skin.
Laser Printer Method
The laser printer method is slightly different, as you’ll need to use a laser transfer paper. This paper works like a thermal transfer paper, so you’ll need to use a heat press to transfer the design onto the skin. Once you’ve printed the design onto the paper, you can cut out the stencil and use the heat press to transfer the design onto the skin.
Note: It’s important to make sure that your printer and paper are compatible with each other. Make sure to read the instructions on the paper and follow the instructions carefully to ensure that your tattoo stencil prints out perfectly.
How to Make a Tattoo Stencil with Printer
Step-by-Step Guide
Creating a perfect tattoo stencil with a printer is not as hard as one may think. To start, gather the necessary materials: a printer, a piece of tracing paper, and a tattoo transfer paper. Place the tracing paper into the printer and print the desired design onto the paper. After the stencil is printed, cut it out to the desired size and shape. Place the stencil onto the transfer paper and tape the edges securely. Use an ink pen to trace the design onto the transfer paper. Once the design is traced, carefully peel off the stencil and discard.
Tips for Making Stencils
Be precise: Make sure to print the stencil in the exact size and shape you desire. It is important to be precise when cutting out the stencil.
Use sharp scissors: To ensure a clean cut, use sharp scissors when cutting out the stencil.
Be careful: When tracing the design onto the transfer paper, be sure to take your time and be careful to avoid any mistakes.
Using a printer to make a tattoo stencil is a simple and easy process. With the right materials and a bit of patience, anyone can create a perfect tattoo stencil with ease. Once the stencil is complete, it is ready to be used for transferring the tattoo design onto the skin.
How to Print Out Tattoo Stencils
Step-by-Step Guide
- Gather the material you need. This includes a printer, tattoo stencil paper, a computer, and a tattoo machine.
- Connect the printer to your computer.
- Open a stencil design on the computer and adjust it to the desired size.
- Print the stencil design onto the stencil paper.
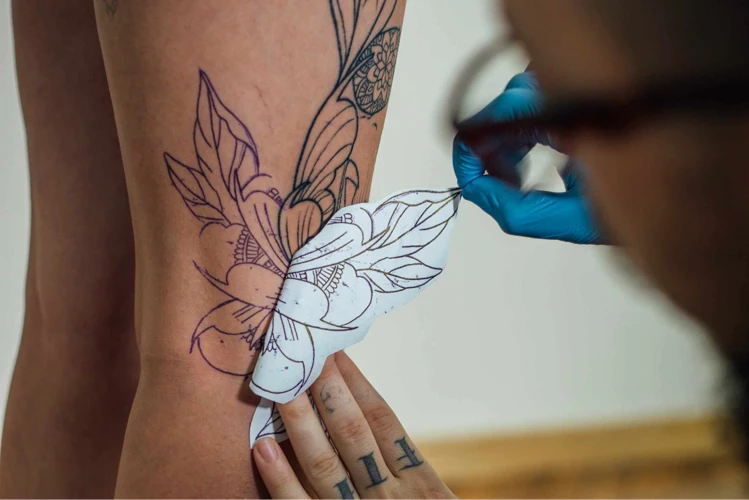
- Turn the stencil paper over and place it ink side down on the skin.
- Use the tattoo machine to trace the stencil pattern onto the skin.
- Remove the stencil paper and start the tattooing process.
Tips for Printing Out Stencils
Ensure good quality: To ensure good quality of the tattoo stencil, use high-quality paper and ink. This will help the stencil to stay on the skin for a longer period of time. Set the printer to the highest resolution: To get the best results, set the printer to the highest resolution possible. This will ensure that the stencil is printed clearly and accurately. Check the stencil before use: Before using the stencil on the skin, check to make sure that the stencil is not blurry or smudged. If it is, reprint the stencil on a new sheet of paper.
With this step-by-step guide, you can now easily print out tattoo stencils at home. Make sure to follow the above tips for a successful stencil printing experience.
How to Print Stencils for Tattoos

Step-by-Step Guide
Begin by gathering the materials needed to print your stencil. You will need a printer, a computer, a sheet of paper, and a tattoo design. It is important to use a printer that has a good quality ink, so that your stencil will be clear and crisp. Once you have all of the materials, open the tattoo design on your computer and print it out.
Next, you need to prepare the stencil paper. Cut a piece of stencil paper to the size of the tattoo design. Place the stencil paper on the printer tray and print the design onto it. Be sure to check the settings before printing, as different printers may need different settings.
Now that your stencil is printed, you must heat-set the design. Place the stencil paper in a safe spot and use a heat gun to heat-set the design. This will ensure that the design will not smudge or fade as it is applied.
Tips for Printing Stencils
When printing your stencils, it is important to use a high-quality printer and ink. Low-quality ink and paper can cause the design to smudge or fade. When heat-setting the design, be sure to use a safe spot and make sure the heat gun is not too hot.
It is also important to use a clean surface when applying the stencil. This will ensure that the design is applied correctly and neatly.
When printing out the tattoo design, be sure to print it at the size you want it to be. This will prevent you from having to adjust the size of the design when you are applying it.
Printing out perfect tattoo stencils can be a difficult process. However, with the right materials, preparation, and patience, you can create a perfect stencil every time.
Troubleshooting
- Stencil not printing correctly: Check your printer settings and make sure you are printing at the highest resolution. Also, make sure your tattoo stencil paper is correctly loaded in the printer.
- Stencil smearing: Make sure the stencil paper is compatible with your ink. If you are using a laser printer, you may need to use special laser tattoo stencil paper.
- Stencil not transferring to skin: Make sure your stencil is dry before applying it to the skin. Also, make sure you are using a transfer medium that is compatible with your stencil paper.
Frequently Asked Questions
What type of printer is required for printing a tattoo stencil?
A thermal transfer printer is typically used for printing tattoo stencils. This type of printer uses heat to transfer the image onto the stencil paper. It is important that the thermal transfer printer is of high quality, as the stencil paper needs to be heated evenly to ensure a clear and precise transfer of the design.
Are there any special tattoo stencil papers available?
Yes, there are special tattoo stencil papers available that are specifically designed for tattoo artists. These papers are made with a wax-like material that is designed to prevent ink from bleeding and smearing, making it easier to create a clean and precise tattoo stencil. Additionally, the paper is designed to be heat-resistant, so it can be safely used in the tattooing process.
What type of ink should be used for printing a tattoo stencil?
When printing tattoo stencils, special thermal transfer ink should be used. This ink is designed to transfer to skin without smudging or fading. It is also safe for skin contact. Many thermal inks are available in a variety of colors, making it easy to match your tattoo design.
Is it Possible to Print a Tattoo Stencil from a Digital File?
Yes! It is possible to print a tattoo stencil from a digital file. With the right equipment and software, you can easily create and print tattoo stencils that are accurate and of high quality. To get started, you will need a computer, a printer, special tattoo stencil paper, transfer paper, and a vector editing software. Once you have all the necessary materials, you can follow the instructions provided in this article to get perfect tattoo stencils with ease.
How long does it take to print a tattoo stencil?
Printing the Stencil
- Design and download the stencil: This process can take anywhere from 5 minutes to several hours, depending on the complexity of the design.
- Printing the stencil: The actual printing of the stencil can take anywhere from 1 to 5 minutes depending on the printer model.
- Cutting and cleaning the stencil: Cutting the stencil out and cleaning up the edges can take anywhere from 2 to 5 minutes.
Total Time
The total time to print a tattoo stencil can range anywhere from 8 minutes to several hours depending on the complexity of the design.
Conclusion
Tattoo stencils are an essential part of the tattooing process and should be done with great care and precision. With the right tools, such as a printer, transfer paper, and a stencil machine, it’s easy to make perfect stencils for even the most intricate of tattoos. With a bit of practice, anyone can master the art of making professional-looking tattoo stencils.