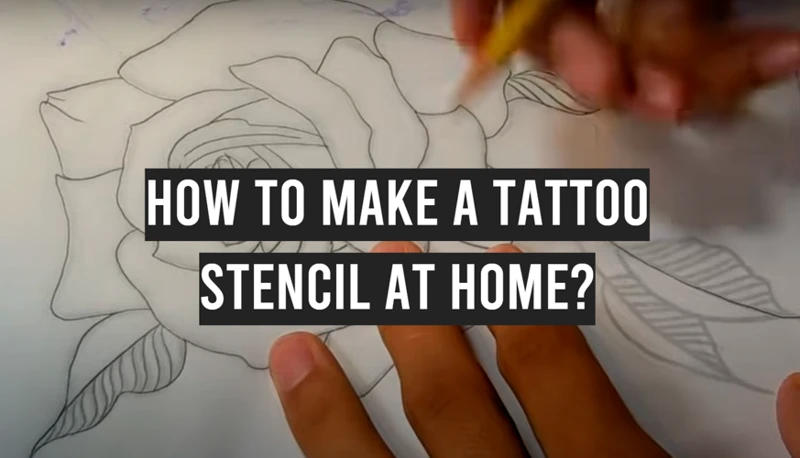
Are you looking to learn how to print tattoo stencils? This comprehensive guide will provide you with all the information you need to know about printing tattoo stencils. It will cover everything from the supplies you’ll need, the different techniques for printing, and even how to apply the stencils to the skin. Whether you’re a tattoo artist or just someone looking to get a tattoo, this guide will help you get the perfect stencil for your tattoo project.
Contents
What You Need for Printing Tattoo Stencils
- Printer: Inkjet or Laser printer.
- Printer Paper: Plain paper or card stock.
- Computer: To create and print tattoo stencils from.
- Tattoo Artwork: A high-res jpeg or vector image of the tattoo design.
- Tattoo Transfer Paper: To transfer the printed tattoo to skin.
Using a printer and plain paper or card stock, you can easily create a tattoo stencil for your next tattoo. All you need is a computer with the artwork you want to use, and tattoo transfer paper to transfer the printed tattoo to skin. With the right tools, you can create a tattoo stencil with printer paper that is perfect for the job.
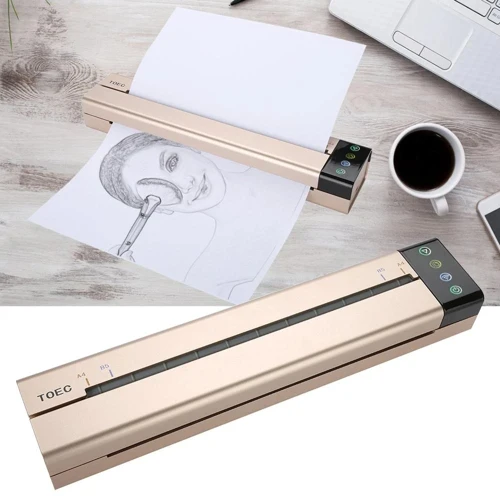
Printer

The most important tool for printing tattoo stencils is a regular printer. Printers come in a wide range of sizes, models, and capabilities, so it is important to choose the best one for the job. Consider the type of tattoos you are planning to design and the size of the stencils when selecting a printer. Some of the most popular models for printing tattoo stencils include laser and inkjet printers. Laser printers are often more reliable and provide better quality, but they can be more expensive than inkjet printers. If you are looking for a more affordable option, inkjet printers are the way to go.
Although most printers can be used to print tattoo stencils, there are a few things to keep in mind when using one. Make sure to use the correct settings when printing, as the wrong settings can cause the stencils to be blurry or distorted. Additionally, be sure to use a high-quality paper to ensure a crisp and clear stencil. Lastly, it is important to remember to clean and maintain the printer regularly to ensure optimal performance.
Overall, knowing how to use a regular printer for tattoo stencils is essential for successful results. With the right printer and a few tips and tricks, you can easily print high-quality tattoo stencils.
Printer Paper
- Weight: Printer paper is usually measured by weight, with 20 lb being the standard. Heavier paper is ideal for projects that require a lot of handling, such as tattoo stencils.
- Coating: Printer paper is usually coated, which helps to prevent smudging and keep your printed tattoo stencils looking great.
- Smoothness: Smooth printer paper is ideal for tattoo stencils, as it allows for a precise transfer of the ink.
- Size: Printer paper usually comes in 8.5”x11” sheets, but you can also find it in larger sizes for larger stencils.
- Brightness: Brightness is measured in brightness points, with higher points indicating a brighter paper. Bright printer paper is best for a precise transfer.
Computer/Laptop
| Equipment | Materials |
| Computer/Laptop | Inkjet Printer |
| Adobe Photoshop or Illustrator | Tattoo Stencil Paper |
| Scanner/Photocopier | Scissors |
To print tattoo stencils, you need a computer/laptop with Adobe Photoshop or Adobe Illustrator installed. You will also need an inkjet printer, a scanner/photocopier, tattoo stencil paper, and a pair of scissors. This equipment will enable you to design and print your own tattoo stencils.
Image Editing Software
- Photoshop: Adobe Photoshop is a digital image editing software that is used by professionals to create high quality prints.
- GIMP: GIMP is a free and open-source image editor that is great for creating and editing stencils.
- Corel Painter: Corel Painter is a digital painting software which features a wide range of tools and features for creating custom stencils.
- Inkscape: Inkscape is a vector graphics editor that can be used to create high quality stencils.
Image editing software is an important tool to use when creating stencils for tattoos. It can be used to manipulate images and create detailed, high-quality prints. Popular software for creating stencils include Adobe Photoshop, GIMP, Corel Painter, and Inkscape. Each of these programs has its own set of features and tools that make it easy to create custom stencils.
Preparing Your Image for Printing
- Print resolution: Make sure the image you are using for your stencil has a high resolution for printing. A resolution of 300 DPI or higher is best for a crisp, clear print.
- Image format: Ideally, you should use an image file type that can be imported into a graphics program like Adobe Illustrator, Photoshop, or Inkscape. PNG, JPEG, and SVG files are all accepted formats.
- Scale: The image should be the exact size you want the stencil to be. If the image is too small, the stencil will be too small. If it’s too large, the stencil will be too large.
- Colors: You should use a black and white image for your stencil. Color images will not work since they will not transfer to the stencil paper.
- Contrast: Make sure the image has enough contrast between the dark and light parts. If there is not enough contrast, the stencil will not turn out correctly.
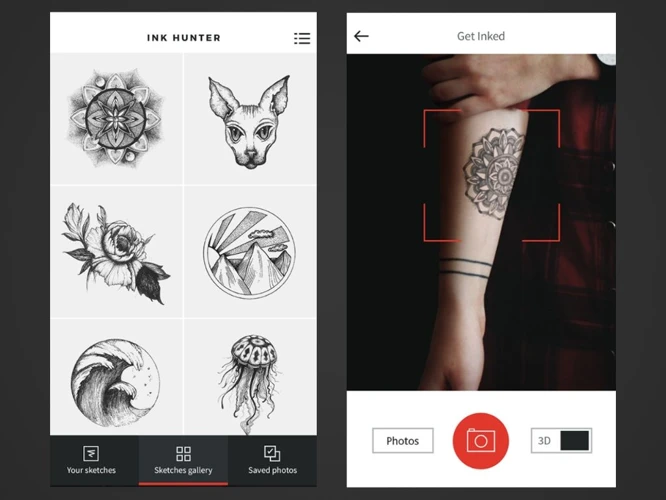
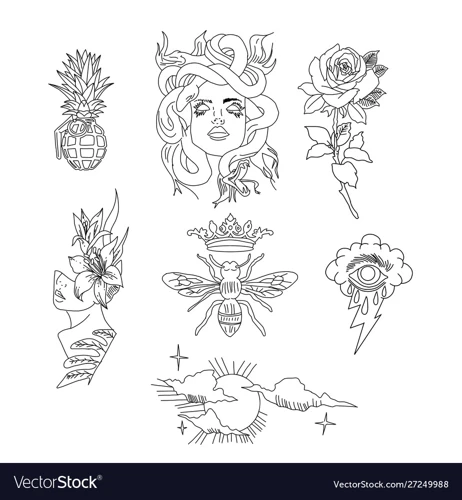
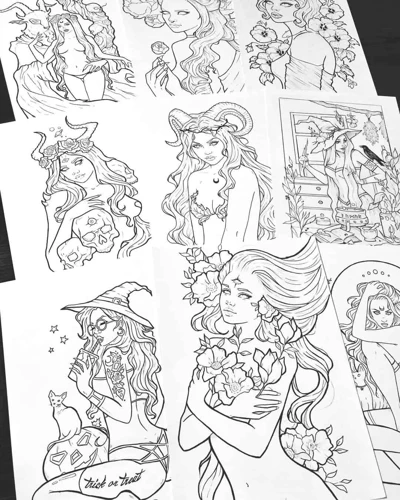
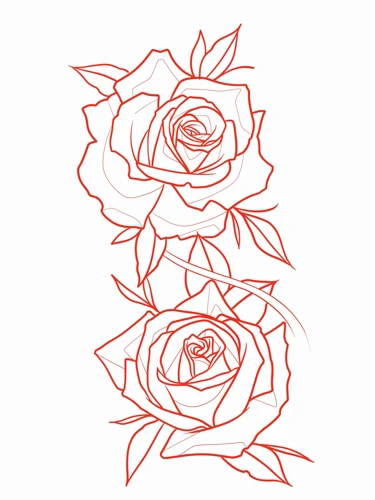
Choose Your Image
Choosing the right image for your tattoo is an important decision. It should represent who you are and what you believe in. Spend some time researching different images and designs to find one that resonates with you. Look through tattoo magazines, online images, and tattoo artist portfolios to find inspiration. When you’ve found the right image, check with your tattoo artist to make sure it’s suitable for stenciling. They may be able to suggest modifications to make it easier to transfer to your skin.
Resize Your Image
Before you can print your tattoo stencil, you will need to resize your image. This can be done using image editing software such as Adobe Photoshop, Paint.NET, GIMP, or any other software of your choice. It is best to start with an image that is larger than the desired tattoo size, as this will ensure the best quality of the printed tattoo stencil.
Step 1: Open your image in the image editing software.
Step 2: Click on the “Resize” button or select “Image Size” from the menu.
Step 3: Enter the desired size for your tattoo stencil in the appropriate boxes and select “OK”.
Step 4: Save the resized image to your computer.
Once you have resized your image, you are ready to print your tattoo stencil using a regular printer. With the correct settings and the right kind of paper, you can make a high-quality tattoo stencil that will last for many years.
Clean Up Your Image
Once you have a rough outline of your tattoo stencil, it’s time to clean it up. For this step, you’ll need a fine-tipped black pen. Begin by tracing the edges of all your lines, making them as clean and precise as possible. Double-check the lines to make sure they are even and tidy, and erase any mistakes.
Once your lines are all straight and even, you can begin to fill in the details. Add any shading, or cross-hatching, to give your stencil a more finished look. Some artists prefer to keep the shading to a minimum, while others opt for a more intricate look. Consider the size of the tattoo and the time it will take to complete it before deciding how much shading you want to include.
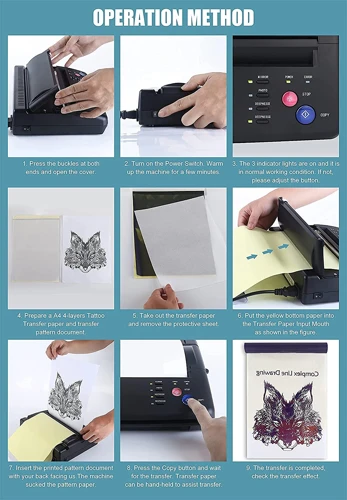
Once you’ve completed your stencil design, you’ll need to create a copy of it on printer paper. To do this, you’ll need a regular printer and some standard printer paper. You can either print the stencil directly onto the paper or use transfer paper to transfer the image. If you choose to use transfer paper, you’ll need to place the paper onto the stencil design, and then use a pen or marker to trace the lines onto the transfer paper. Once the image is transferred, you can print it onto the printer paper.
When your stencil is printed, you can begin to transfer it onto the skin. If you’re using a transfer paper, simply place the paper onto the skin and trace the lines. Otherwise, you can use a stencil machine to make the transfer. Whichever method you use, make sure to press it firmly against the skin to ensure that the lines are clear and crisp.
Make Your Image Black & White
To create a stencil, you need to make a black and white image. Colored images will not work as the printer will not be able to differentiate between the colors. Here are the steps to make your image black and white:
- Open the image in a photo editing software such as Adobe Photoshop.
- Go to the Image menu and select Adjustments > Desaturate.
- To make the image darker, go to Image > Adjustments > Brightness/Contrast and adjust the contrast and brightness to get the desired effect.
- Save the image.
Once the image is black and white, you can use a regular printer to print out the tattoo stencil. You can also use a laser printer or a professional tattoo stencil printer depending on the complexity of your stencil.
Adjust Your Image Levels
In order to create a clean and crisp tattoo stencil, you need to adjust your image levels. This step is essential for creating a tattoo stencil which looks professional. An image with poor levels will not transfer correctly onto the skin and will result in a blurry or indistinct tattoo.
Adjusting Image Levels
| Mode | Levels | Description |
|---|---|---|
| RGB | 0, 0.7, 255 | This will create a highly contrasted image. |
| Grayscale | 0, 0.7, 255 | This will create a less contrasted image. |
| CMYK | 0, 0.7, 255 | This will create a highly saturated image. |
Adjusting image levels is a simple but important step when creating a tattoo stencil with a regular printer. Adjusting the levels will ensure the tattoo stencil transfers clearly and looks professional.
Save Your Image
Once you have the pattern printed, it is important to save the image for future reference. This will enable you to make any adjustments to the pattern if necessary. Additionally, you can use the saved image as a reference when you are creating the stencil.
Using a scanner or camera, you can save the image as a digital file. If you are using a scanner, make sure to adjust the settings accordingly. If you are using a camera, make sure to adjust the lighting and focus to ensure the image is clear.
Once the image is saved, you can open the file in the image editing software of your choice. This will enable you to make any necessary adjustments to the pattern, such as resizing, cropping, or adding text. Once you have finished editing the pattern, save it as a .JPEG or .PNG file and you are ready to create the stencil.
Tip: Store your saved images in a secure file on your computer or external storage device. This will ensure your stencils and patterns are safe and secure.
Printing Your Tattoo Stencil
Printing your tattoo stencil is an important step. It requires careful attention and preparation in order to guarantee a successful outcome. Here are the steps you need to take in order to print your own tattoo stencil:
| Step 1 | Choose the right printer. Laser printers are best for printing tattoo stencils. This is because they produce a finer and more even output than inkjet printers. |
| Step 2 | Choose the right paper. Use paper specifically designed for tattoo stencils. This type of paper is thicker and less prone to smudging. It also has a special coating that helps the stencil to stick to the skin. |
| Step 3 | Design your stencil. Use a design program such as Photoshop or Illustrator to create your design. Be sure to use a vector-based program, as this will ensure that the design prints clearly. |
| Step 4 | Print your design. Once you have designed your tattoo, you can print it out on the special paper. Make sure to use the highest printing quality setting. |
| Step 5 | Transfer your design. Once you have printed your tattoo, you can use a transfer paper to transfer the design onto the skin. This will help to ensure that the design is accurately transferred. |
Follow these steps to ensure that your tattoo stencil is accurately printed and transferred onto the skin. With the right materials, techniques, and attention to detail, you’ll be able to create a beautiful tattoo that will last for years to come.
Load the Printer Paper

- Turn on the printer.
- Open the paper tray and insert the printer paper.
- Adjust the paper guides to fit the size of the paper.
- Close the paper tray.
It is important to load the right type of printer paper when printing tattoo stencils. Using regular printer paper will produce low-quality results. For best results, use heavier paper that won’t wrinkle and warp when exposed to water. This type of paper will also ensure that your tattoo stencil remains durable and can be reused.
Choose a Print Setting
Before you start printing your tattoo stencil, you need to choose the right print setting for your printer. Depending on your printer model, the exact settings may vary, but most of them share the same basic steps.
Choose a Paper Type: The type of paper you use is important. Most printers can handle plain white copy paper without any problems, but if you want to get a better color or detail, you can try using glossy photo paper.
Adjust the Resolution: Printing at a higher resolution will give you more detailed results, but it will also take longer to print and use more ink. Most printers have a “draft” or “fast” mode that will print faster but with less detail.
Choose the Right Ink: If you are using a regular printer, you will want to use a water-based pigment ink. This type of ink is designed to be waterproof and fade-resistant, and is the best choice for tattoo stencils.
Print a Test Page: Before you print your actual tattoo stencil, you should print a test page to make sure the settings are correct. This will help you avoid any surprises when you actually start printing your stencil.
By following these steps, you should be able to find the right print settings for your tattoo stencils and get the best results. With the right settings and a good quality printer, you can create beautiful and detailed tattoo stencils with your regular printer.
Print Your Stencil
- Print Your Stencil is an online store that specializes in providing tattoo stencils for use in the tattooing process.
- They offer a wide selection of stencils, ranging from traditional tribal designs to more modern and custom designs.
- The stencils are printed on high-quality paper, which is designed to stand up to the rigors of the tattooing process.
- The company also offers a variety of tools and supplies to help make the stenciling process easier and faster.
- In addition to stencils, they also offer pre-made designs, which can be printed on the same high-quality paper.
- Print Your Stencil also offers a variety of tutorials and videos to help customers learn how to use their products.
- They have a team of experienced tattoo artists who are available to answer any questions customers may have.
- Their products are designed to make the tattooing process as easy and painless as possible.
- Print Your Stencil is dedicated to providing quality products and excellent customer service.
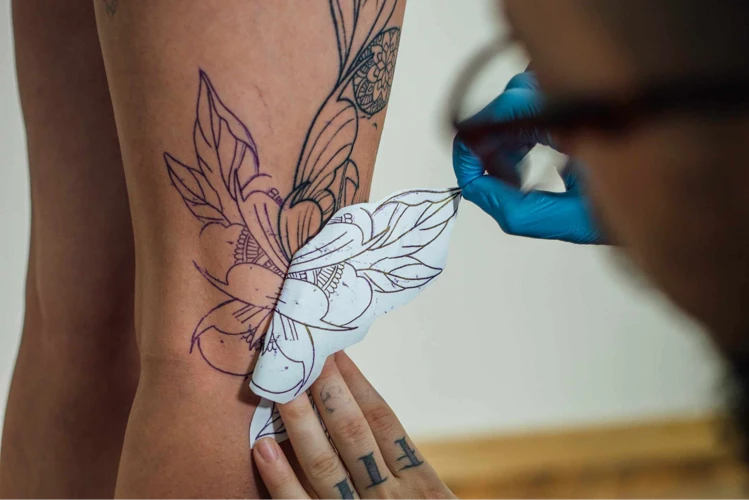
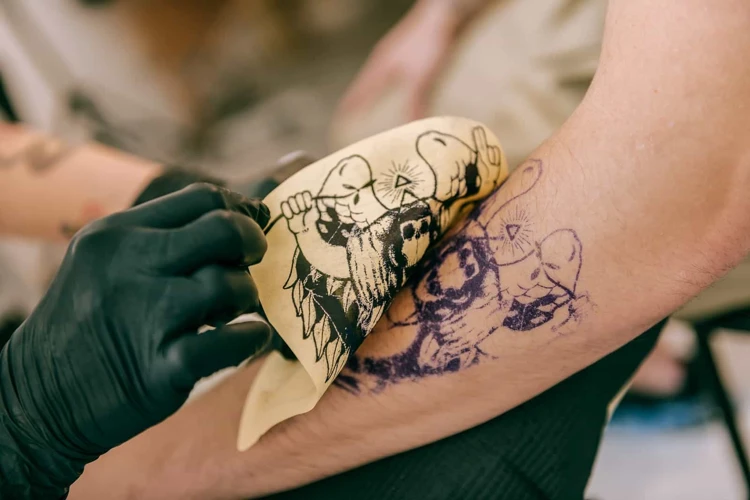
Transferring the Tattoo Stencil to the Skin
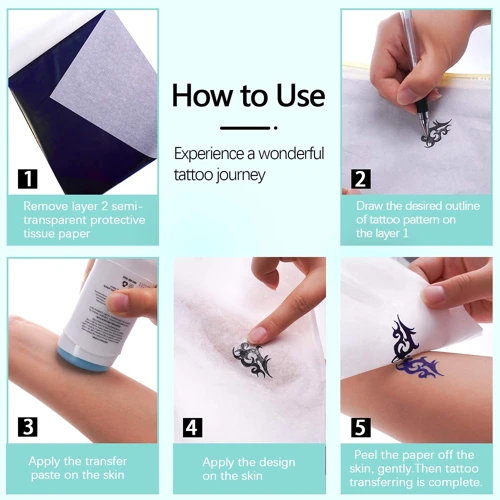
Once you have printed your tattoo stencil, the next step is to transfer it to the skin. Here are the steps to do so:
| Step | Description |
|---|---|
| Step 1 | Make sure the area of the skin to be tattooed is completely clean and oil-free. |
| Step 2 | Cut out the tattoo stencil, making sure to keep it small enough to fit the area of the skin to be tattooed. |
| Step 3 | Using a tattoo transfer paper or tattoo stencil transfer solution, transfer the tattoo stencil to the skin. |
| Step 4 | Let the tattoo stencil sit on the skin for the recommended length of time. |
| Step 5 | Gently remove the tattoo stencil paper or solution to reveal the transferred tattoo stencil. |
After transferring the tattoo stencil to the skin, you are now ready to begin your tattooing process. Make sure to prepare all the necessary supplies and materials before you start. With the help of a regular printer and the right kind of paper, you can easily create your own tattoo stencils that you can transfer to the skin with ease.
Removal of the Tattoo Stencil
Once you have finished printing your tattoo stencil, it is important to remove it from the paper. To do this, you will need a few supplies:
- A damp cloth
- Scissors
- Tape
First, dampen the cloth and use it to gently remove any excess ink from the tattoo stencil. Once the ink is removed, use the scissors to cut away the stencil from the paper. If the stencil is too difficult to remove, you can also use tape to help pull it off. Once the stencil has been removed, you can use it as a template for your tattoo.
It is important to remember that when using a regular printer for tattoo stencils, the stencils can be quite fragile. Therefore, it is important to take care when removing them from the paper so as not to damage them.
Frequently Asked Questions
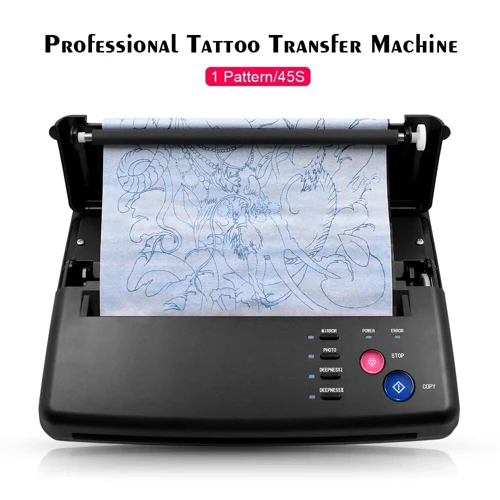
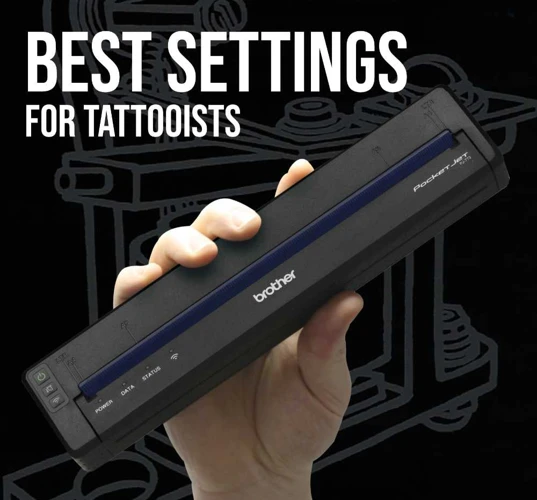
What type of printer do I need to print tattoo stencils?
Inkjet Printers: Inkjet printers are best suited for printing tattoo stencils as they produce high-quality images with vibrant colors. The printouts are also waterproof and fade-resistant, ensuring your stencils last longer. When choosing an inkjet printer, consider the following features:
- Print resolution – The higher the resolution, the sharper the stencils will be.
- Ink type – Choose a printer that uses pigment-based inks for the best results.
- Paper type – Most inkjet printers can print on a variety of paper types, including photo paper and specialty tattoo stencil paper.
- Print speed – Consider how quickly you need to print your stencils and choose a printer with a matching speed.
Thermal Printers: Thermal printers are also suitable for printing tattoo stencils. They are generally more affordable than inkjet printers and don’t require any ink or toner cartridges. However, the printouts produced by thermal printers are not as vibrant or waterproof as those produced by inkjet printers. When choosing a thermal printer, consider the following features:
- Print resolution – The higher the resolution, the sharper the stencils will be.
- Print speed – Consider how quickly you need to print your stencils and choose a printer with a matching speed.
- Paper type – Most thermal printers can print on a variety of paper types, including photo paper and specialty tattoo stencil paper.
What type of paper should I use to print tattoo stencils?
- Laser Printer Paper: Laser printer paper is specifically designed for laser printers. It is thicker than regular printer paper and has a smooth finish, which is ideal for producing sharp, detailed images.
- Copy Paper: Copy paper is also suitable for use in laser printers. It is a thinner paper than laser printer paper, but still produces good quality prints.
- Photo Paper: Photo paper is usually used for printing photographs. It is thicker than copy paper and has a glossy finish, which will create a more vibrant and detailed tattoo stencil.
- Stencil Film: Stencil film is a special type of tracing paper that has been designed specifically for making tattoo stencils. It is easy to use and produces sharp, detailed stencils that are ideal for use in a tattoo machine.
Are there any special settings for printing tattoo stencils?
When printing tattoo stencils, it is important to use the correct settings for the best results. To get the best results, you should use the highest print quality setting, and select a medium to heavy paper stock. Additionally, if you are printing on a laser printer, you should disable any toner-saving features, as they reduce the amount of toner and can result in poor quality images.
How do I transfer the stencil onto the skin?
Once your stencil is printed, simply place it face down on the skin and press firmly. You can use a damp cloth to ensure the stencil is securely attached to the skin. Once it’s firmly in place, gently remove the paper backing and you are ready to begin tattooing.
How should I care for the tattoo after the stencil is applied?
Cleanse: Cleanse the area with mild soap and water and pat dry with a clean towel.
Protect: Cover the area with a thin layer of petroleum jelly or A&D ointment.
Moisturize: Apply a thin layer of moisturizer to the area to help prevent the skin from drying out.
Cover: Cover the area with a loose bandage to help protect the tattoo from dirt and bacteria.
Reapply: Reapply the moisturizer and bandage as needed throughout the healing process.
Conclusion
Creating a quality tattoo stencil can be a challenge, but with the right tools and techniques, it is possible. Whether you are tracing a design on tracing paper, using a thermal copier or printer, or hand-drawing the stencil, the most important thing is to take your time and check for accuracy. With careful attention to detail, you can produce a stencil that will provide a perfect outline for your tattoo.