Are you looking for a fun and creative way to express yourself? Making a temporary tattoo with Sharpie markers is a great way to show off your style without having to commit to a permanent tattoo. This guide will show you how to make a temporary tattoo with Sharpie in just minutes! Follow the steps below to learn how to create your own custom tattoo with Sharpie markers.
Contents
What You Will Need
- Sharpie in your desired color
- Small bowl of warm water
- Cotton swab
- Paper towel
For longer lasting tattoos, you may want to also use a hairspray to help the tattoo stay on your skin for a longer period of time. To learn more about how to make a sharpie tattoo last, read our article on the topic.
Preparing the Skin
- Cleanse: Start by washing the area of skin you want to tattoo with soap and water. Make sure it is free from oils, dirt, and other impurities.
- Dry: Once the skin is clean, completely dry it with a clean cloth or paper towel.
- Smooth: Use a gentle exfoliant to smooth the skin and allow the Sharpie ink to adhere better.
- Shave: If necessary, shave the area of skin you want to tattoo with a clean razor to remove any excess hair.
- Moisturize: Apply a light layer of lotion or moisturizer to the area to ensure the ink will stay on longer.
Creating a fun, temporary tattoo with Sharpie is easy, but it is important to prepare the skin correctly for the best results. By following these simple steps, you can make sure that your fake tattoo is long-lasting and looks great.
Creating the Design
- Choose an easy-to-draw design that is small enough to fit in the desired area. Make sure to use a light colored Sharpie for best results.
- Use a paper towel to clear the skin from any oils, lotions, or dirt before applying the design.
- Trace the design onto the skin with a Sharpie, then fill in the shapes with the marker.
- Let the tattoo dry completely before adding a layer of hairspray to help it last longer.
For best results and to make Sharpie tattoo last longer, let the hairspray dry before washing the area with soap and water.
Applying the Sharpie Tattoo
Step 1: Gather the supplies needed for a Sharpie tattoo, which include a Sharpie marker, rubbing alcohol, a cotton swab, and a paper towel.
Step 2: Clean the area of skin where the tattoo will be applied with rubbing alcohol. This helps the Sharpie adhere to the skin.
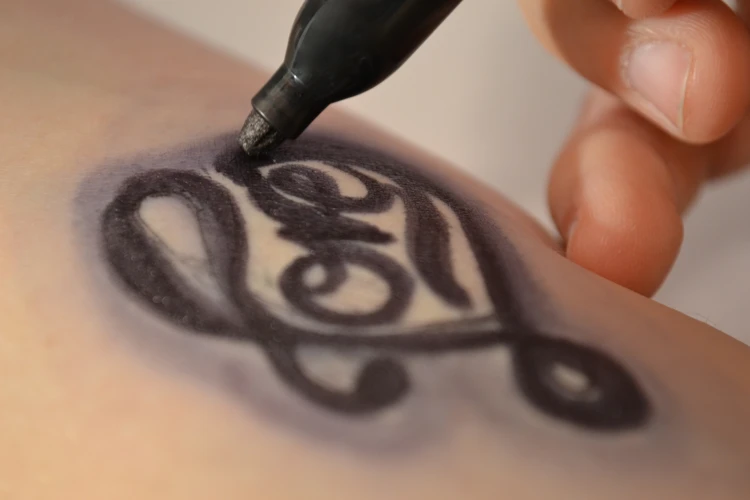
Step 3: Sketch the design onto the skin with the Sharpie marker. Make sure to press the marker firmly onto the skin and draw the design slowly and accurately.
Step 4: Let the Sharpie drawing dry completely. This could take anywhere from 10-30 minutes, depending on the complexity of the design.
Step 5: Once the Sharpie tattoo is dry, dab it with a cotton swab soaked in rubbing alcohol to set the ink. This helps the tattoo stay on the skin for a longer period of time.
Step 6: To ensure the tattoo lasts as long as possible, apply a thin layer of lotion over the design and allow it to dry. This keeps the skin from drying out and helps the tattoo last longer.
Step 7: Enjoy your Sharpie tattoo and be sure to take good care of the area to get the most out of your design.
Finishing the Tattoo

Draw the design on your skin with the Sharpie marker. Since Sharpie markers are permanent, make sure to draw your design lightly and make any needed corrections as you go. Once the drawing is complete, press a thin layer of tissue paper onto the drawing and gently rub it with your finger or a cotton swab. This sets the ink and helps it to last longer.
Seal the tattoo with hairspray. Spray a light layer of hairspray over the drawing. Allow the hairspray to dry completely and then gently wipe off any excess residue with a damp cloth. For best results, use a hairspray that is formulated specifically for sealing body art.
Your temporary tattoo is now complete and ready to show off. With a little practice and creativity, you can learn how to make a tattoo with marker in just minutes.
Making the Sharpie Tattoo Last
Avoid Sunlight
To make your Sharpie tattoo last, it’s important to avoid exposing it to direct sunlight. Sunlight will cause the color to fade quickly, reducing the life of your tattoo.
Keep Skin Moisturized
Keeping the skin around your Sharpie tattoo moisturized is also important. Applying lotion regularly will help keep your skin soft and supple, and prevent the tattoo from cracking and fading.
Wash Gently
When washing your Sharpie tattoo, be sure to use a gentle cleanser and lukewarm water, and avoid scrubbing or rubbing the area.
Use an Alcohol-Free Makeup Remover
Using an alcohol-free makeup remover is a great way to help make your Sharpie tattoo last longer. This will help remove any dirt and oils that may have built up on the tattoo.
If you’re looking for tips on how to make a Sharpie tattoo without baby powder, you can check out our guide for that too.
Alternative Ways to Make a Temporary Tattoo with Sharpie
- Sharpie Tie-Dye: Create your own colorful tie-dye tattoo by coloring a piece of paper with Sharpie markers in any pattern you like. Cut a shape out of the colored paper and stick it on your skin with temporary adhesive.
- Sharpie Stencils: Trace a design onto a piece of sturdy paper and carefully cut it out with an X-acto knife. Place the stencil onto your skin and fill in the design with Sharpie marker. Use hairspray to make it last longer.
- Sharpie Water Transfer: Print out a design or draw your own onto a sheet of wax paper. Place the wax paper face down onto your skin then use a damp sponge to transfer the design onto your skin. Color it in with a Sharpie and use hairspray to make it last longer.
- Sharpie Silhouette: Cut a silhouette of your favorite design out of a piece of cardboard and place it onto your skin. Color in the silhouette with Sharpie and use hairspray to make it last longer.
Frequently Asked Questions
Does this method work on all skin types?
- Yes, this method works on all skin types.
- However, it is best to make sure that the skin is clean and dry.
- If you have sensitive skin, you should perform a patch test to make sure you won’t have a reaction.
- If you have oily skin, you may want to use a primer or oil-free moisturizer before applying the Sharpie.
How Long Will the Tattoo Last?
The Sharpie tattoo will last for up to a week, depending on the area of the body and how often it is exposed to water and friction. To ensure the tattoo lasts as long as possible, it is best to keep it away from water, lotion, and abrasive materials.
Is this type of Tattoo Safe?
Temporary tattoos made with Sharpie markers are a fun way to show off your creativity, but it is important to consider the safety of this type of tattoo. Sharpie markers contain volatile organic compounds, which can cause skin irritations, and the ink can also lead to allergic reactions. Additionally, there is a risk of infection when making a tattoo with Sharpie markers. It is important to use sterile needles and practice proper hygiene when making a temporary tattoo.
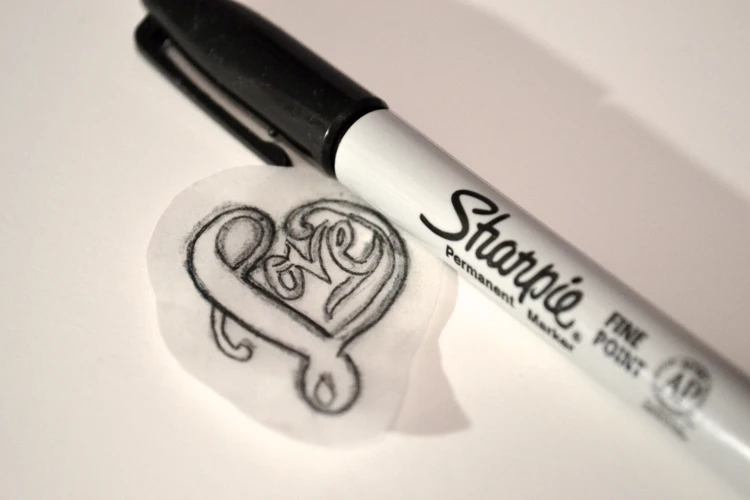
What kind of Sharpie should I use?
- Sharpie Permanent Markers: These markers come in a wide variety of colors and are great for making long-lasting, vibrant tattoos.
- Sharpie Metallic Markers: These markers are great for creating a unique look with a metallic finish.
- Sharpie Paint Pens: These pens are perfect for creating a more artistic or elaborate tattoo design.
- Sharpie Oil-Based Paint Markers: These markers are great for adding a glossy finish to your tattoo.
Always make sure to pick the right type of Sharpie for the job. Permanent markers work best on skin and can last for weeks or even months. Metallic markers will add a unique look to your tattoo. Paint pens create a more artistic look and oil-based paint markers add a glossy finish.
Are there any special techniques needed to make the tattoo look its best?
- Thick Lines: For the tattoo to look its sharpest, it is important to make sure the lines of the tattoo are thick and bold. This will help the tattoo stand out and look its best.
- Smooth Surfaces: The surface where the tattoo is applied should be cleaned and free of any dirt or dust, as this can affect the tattoo’s appearance.
- Consistent Pressure: Applying consistent pressure when drawing the lines of the tattoo is important for the tattoo to look its best.
- Smoothing Out: After the tattoo is finished, it can be helpful to use a cotton swab or finger to smooth out any rough edges or uneven lines. This will help the tattoo look its best.
Conclusion
Sharpie temporary tattoos are a great way to express yourself without the commitment of a permanent tattoo. They are easy to make and can last for up to a week or more if done correctly. With just a few supplies, you can create a fun and unique tattoo in just minutes.