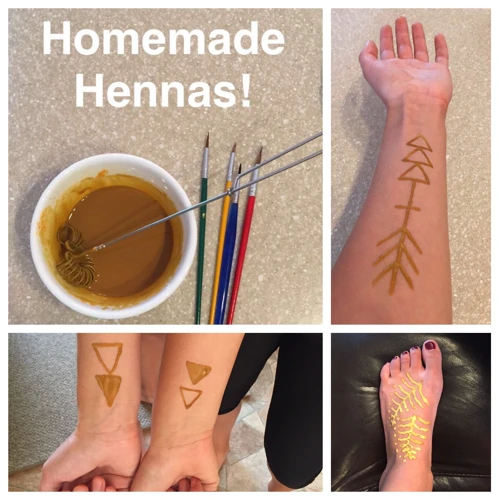
Do you want to learn how to make a homemade henna tattoo? Have you ever admired the intricate designs and patterns of henna tattoos but didn’t know how to create them? If so, this article will provide you with the steps to create your own beautiful henna tattoo at home. You will learn how to mix the henna paste, how to apply the design and how to care for your tattoo. With a few simple materials and a bit of creativity, you can make your own henna tattoo in the comfort of your own home.
Contents
What Is Henna?
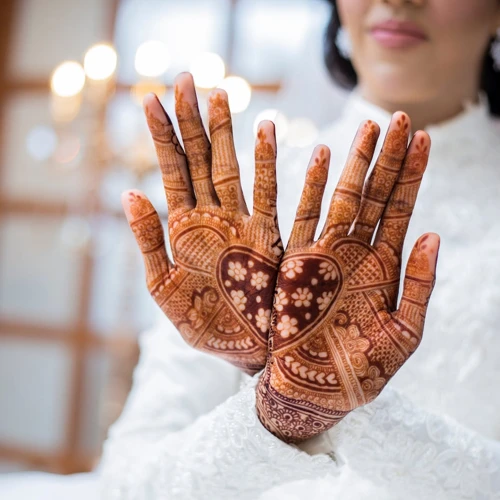
Henna is a natural dye made from the leaves of the henna plant, scientifically known as Lawsonia inermis. The crushed leaves of the henna plant are mixed with other ingredients such as lemon juice and essential oils to create a paste-like texture. This paste is applied to the skin in intricate designs and left to dry. As it dries, the paste begins to flake off the skin and leaves behind a deep red-brown stain that typically lasts up to three weeks.
Henna is a popular choice for body art due to its natural, non-permanent nature. It has been used for centuries in India and the Middle East for ceremonial and religious occasions, including weddings, festivals, and other special occasions.
Making your own henna tattoo is a great way to express yourself and can be done easily at home. All you need is henna powder, lemon juice, and essential oils as well as some basic supplies. With simple instructions and a few supplies, you can create your own beautiful henna tattoo at home.
What You Will Need to Make a Henna Tattoo

Henna Powder: To create your own henna tattoo ink, you will need henna powder, which is available in many craft stores or online.
Lemon Juice: You will also need fresh lemon juice to mix with the henna powder, as it helps to activate the dye molecules in the henna powder.
Essential Oils: A few drops of essential oils such as lavender or eucalyptus oil can also be added to the mixture to enhance the scent of the henna.
Small Bowl: To mix the henna powder, lemon juice, and essential oils, you will need a small bowl.
Henna Paste Applicator Bottle: To apply the henna paste to your skin, you will need an applicator bottle that can be filled with the henna paste you have created.
Plastic Wrap: To keep the henna paste on your skin for longer, you will need to wrap the area with plastic wrap.
Paper Towel: To clean up any spills from the henna paste, you will need a paper towel.
Toothpick: You will also need a toothpick to create intricate designs with the henna paste.
How to Make a Henna Tattoo
Making the Henna Paste
Making your own henna paste is relatively easy and doesn’t require many ingredients. To make henna paste, you’ll need to mix together henna powder, lemon juice, and essential oil. Start by sifting the henna powder through a sieve into a bowl. Once sifted, add the lemon juice to the henna powder and mix it together until you get a paste-like consistency. Finally, add a few drops of essential oil and mix well. Your henna paste is now ready!
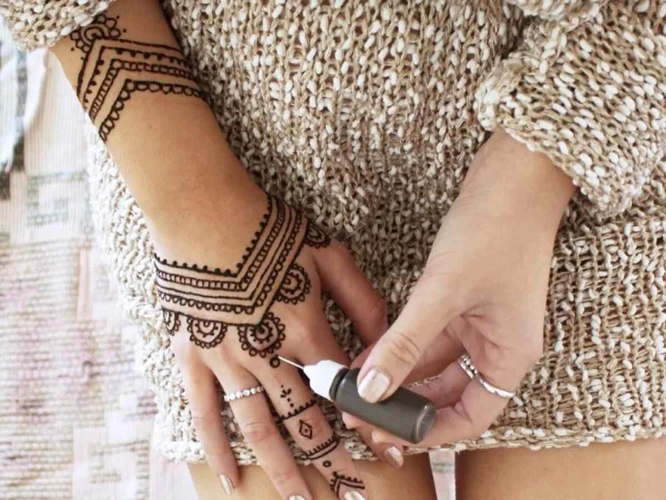
Applying the Henna Paste
Once the henna paste is ready, you can now start applying it to your skin. Start by pulling the henna paste into a cone-like shape using a plastic bag or parchment paper. Cut off the tip of the cone and fill it with the paste. Squeeze out the paste onto your skin, starting from the center and working your way out. Make sure the paste is not too watery. Once you have the desired design on your skin, leave it to dry for at least 4-6 hours.
NOTE: Do not wash off the paste with soap and water. Leave it on until it flakes off on its own.
How to Make Your Own Henna Tattoo Ink
Ingredients Needed
- Henna powder
- Lemon juice
- Essential oils
- Sugar
Preparation Steps
- Mix henna powder with lemon juice in a bowl until a paste is formed.
- Add a drop of essential oil to the paste for a strong scent.
- Add a teaspoon of sugar to the paste to increase the adhesive properties.
- Stir the paste until it is the consistency of yogurt.
- Transfer the paste to an applicator bottle.
- Apply the paste to the desired area and let it dry.
Tips for Making a Beautiful Henna Tattoo
- Gather the Necessary Materials – To create your own henna tattoo, you’ll need henna powder, distilled water, sugar, essential oils, a toothpick, and a henna cone.
- Mix the Henna Paste – Begin by mixing the henna powder with distilled water, sugar, and essential oils. Make sure you mix the ingredients thoroughly until the paste is smooth, not lumpy.
- Fill the Henna Cone – Using the toothpick, fill the henna cone with the henna paste. Make sure to leave some room at the top so you can seal the cone.
- Apply the Henna Tattoo – Once the henna cone is filled, you’re ready to apply the henna tattoo. Slowly and steadily press the henna cone against your skin, moving it back and forth in a steady motion. You can also use a stencil or freehand your design.
- Let the Henna Tattoo Dry – Once you have finished applying the henna tattoo, let it dry for at least 30 minutes. Once it is dry, remove the henna paste from your skin.
- Protect the Henna Tattoo – To keep your henna tattoo looking beautiful, apply a thin layer of olive oil or coconut oil over the tattoo. This will help to keep the tattoo from fading or smudging.
Removal of Henna Tattoos
If you’re not satisfied with your Henna Tattoo, it can be removed with a few simple steps. Lemon Juice is a natural bleaching agent that can be used to lighten the tattoo. Apply fresh juice of a lemon directly onto the tattoo and let it sit for about 15 minutes. Rinse it off with cold water and repeat the process until the tattoo fades. Hair Removal Creams are also effective in removing Henna Tattoos. Apply a generous amount of the cream directly onto the tattoo and leave it on for 10 minutes. Rinse it off with cold water and repeat the process until the tattoo fades away. Exfoliating the skin can also help to remove the tattoo. Use a gentle exfoliating scrub and scrub the area for a few minutes. Rinse it off with cold water and repeat the process until the tattoo fades away.
Pros and Cons of Henna Tattoos
- Pros:
- Henna tattoos are temporary and last anywhere from one to four weeks.
- Henna tattoos are safe and natural, as the dye used in henna tattoos is derived from a plant-based product.
- Henna tattoos are less painful than traditional tattoos, as there is no needle involved.
- Henna tattoos are more affordable than traditional tattoos.
- Henna tattoos are a great way to test out a tattoo design before committing to a permanent one.
- Cons:
- Henna tattoos may not be as vibrant as traditional tattoos.
- Henna tattoos can cause allergic reactions in some people.
- Henna tattoos can become patchy as they fade.
- The quality of henna tattoos can vary greatly depending on the quality of henna used.
- Henna tattoos are not as precise as traditional tattoos, as they are done freehand.
Frequently Asked Questions
What Supplies Do I Need to Create My Own Henna Tattoo at Home?
Henna Powder: To create your own henna tattoo, you need to get your hands on a good quality henna powder. Make sure to buy one that is made from all-natural ingredients.
Lemon Juice: A few drops of lemon juice helps to activate the henna powder and turn it into a paste.
Essential Oil: A few drops of essential oil, such as lavender or eucalyptus, helps to keep the paste moist and gives it a nice smell.
Conical Tip Applicator Bottle: This bottle will be used to pipe the henna paste onto your skin.
Toothpick: Use to create fine details.
Paper Towels: To clean up any mess you might make.
Cotton Swabs: To clean up any mess you might make.
Plastic Wrap: To cover the design and keep it moist for a longer period of time.
Hair Dryer: To help speed up the drying time.
How Long Will My Henna Tattoo Take to Dry?
Henna tattoos typically take between 1-2 hours to dry. During this time, avoid washing or touching the tattoo, as this will disrupt the drying and can affect the quality of the design. Once the henna is dry, it will last between 1-3 weeks, depending on the location of the tattoo and the care taken to preserve it. After drying, it is important to use an oil, such as coconut or olive oil, to help preserve the tattoo.
How can I design my own henna tattoo?
Know the basics: Before you start designing your own tattoo, it is important to understand the basics of henna art. Learn about the different types of henna and their properties, such as the different shades of color and the longevity of the stain.
Gather inspiration: Next, gather inspiration for your design. Look for designs online, in books, or even in nature. Take note of the shapes, color combinations, and patterns that appeal to you and use them as a starting point for your own design.
Create a sketch: Once you have gathered some inspiration, create a rough sketch of your design. This will allow you to experiment with different ideas and see how they will look on paper.
Draw the design: Once you have settled on a design, draw it on paper. Try to keep the lines as clean and precise as possible.
Transfer the design: When you are happy with the design, transfer it onto your skin. This can be done with a transfer paper or even with a pencil.
Apply the henna paste: Now it’s time to apply the henna paste. Make sure to follow the instructions on the package carefully. Use a cone or a brush to apply the henna paste onto your skin.
Let it dry: Once the henna paste has been applied, let it dry for several hours or overnight.
Wash off the henna: When the henna has dried, you can wash it off with cold water. This will leave a beautiful stain on your skin.
Show off your new tattoo: Finally, you can show off your new henna tattoo! Enjoy your beautiful and unique design!
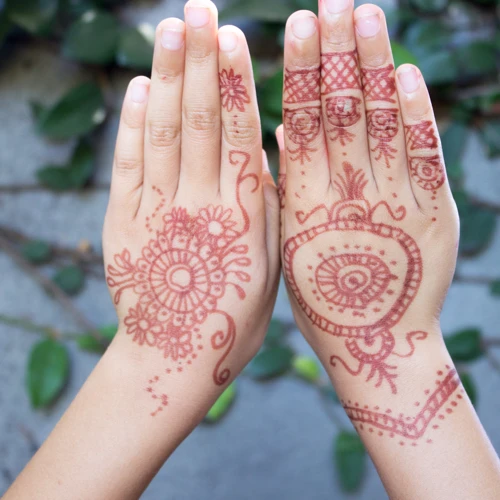
How Long Will My Henna Tattoo Last?
Henna tattoos usually last anywhere from 1-3 weeks depending on the type of henna used and how it was applied. Darker, thicker henna tattoos tend to last longer than those that are light or thin. The life of a henna tattoo is also affected by the person’s skin type and activities; for example, swimming or excessive sweating can cause the henna to fade more quickly.
Are there any risks to creating my own henna tattoo at home?
Yes. DIY henna tattoos come with certain risks, such as:
- Allergic reaction: If the henna is not natural, it may contain certain chemicals that can cause an allergic reaction, such as skin irritation or rashes.
- Infection: Improperly prepared henna can cause bacterial infection. It is important to use a sterile needle to avoid any risk of infection.
- Scarring: Henna tattoos can cause scarring if the paste is left on the skin for too long or if the designs are too deep.
It is important to take proper safety measures while creating your own henna tattoo. Make sure to use natural henna and sanitary tools and follow the instructions carefully.
Conclusion
Creating beautiful henna tattoos is an enjoyable activity that can be done safely and easily at home. With the right supplies and a little bit of practice, you can create beautiful, unique henna designs that are sure to make heads turn.